Our appointment tool allows customers to book your services directly through your profile straight to your diary, the whole process is in complete control by the listing owner, you set the prices, services and diary slots.
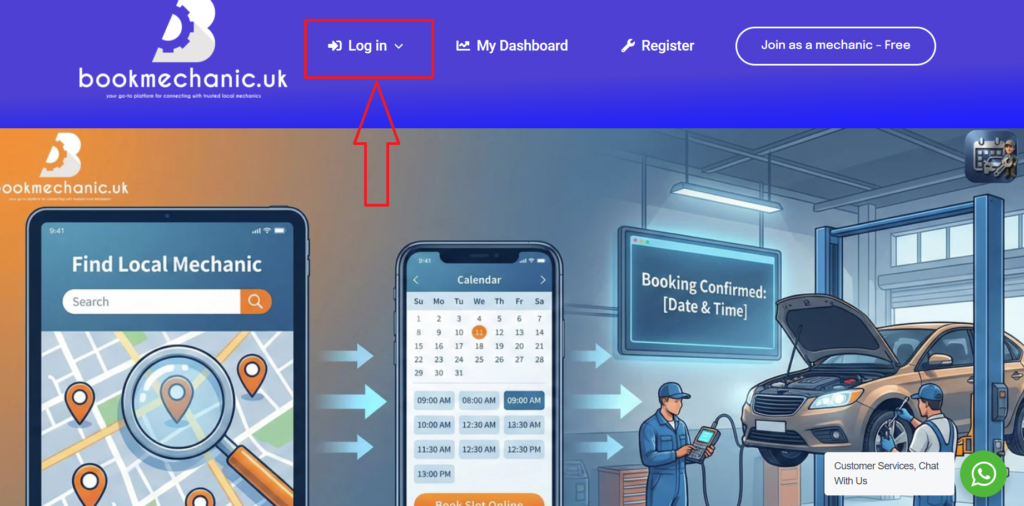
First head over and log into your dashboard.
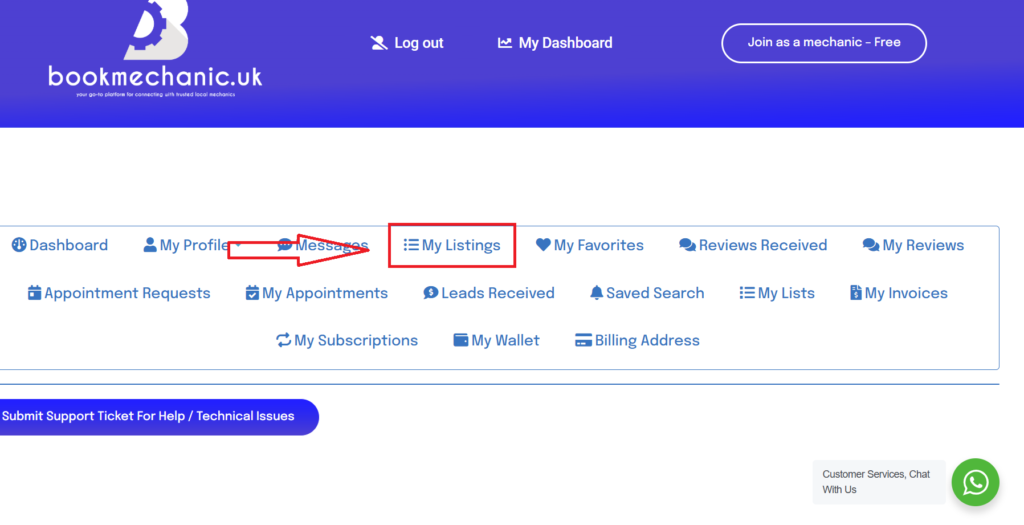
Once on your dashboard page select “My Listings” to access your available listings.
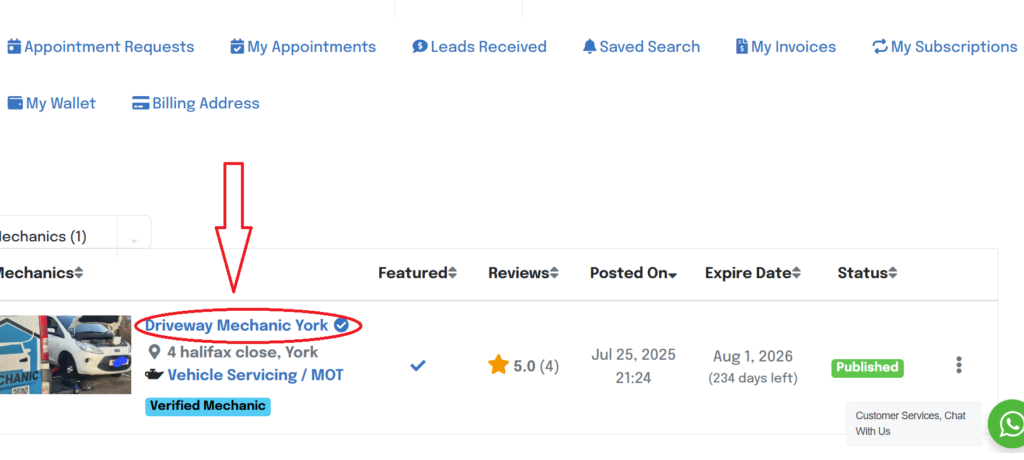
Select the company name on the listing to access the front page editor.
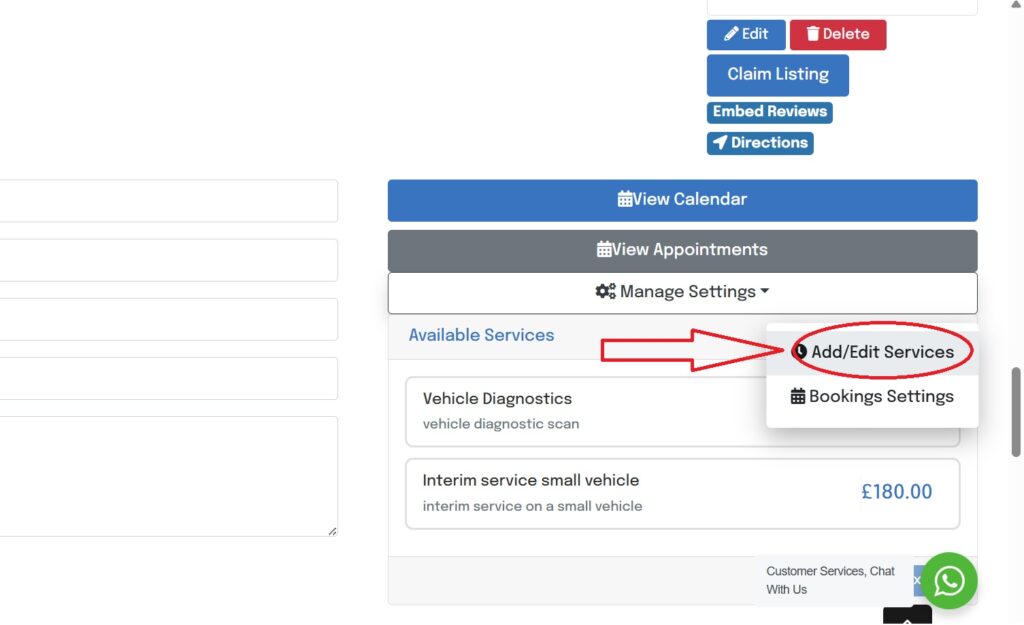
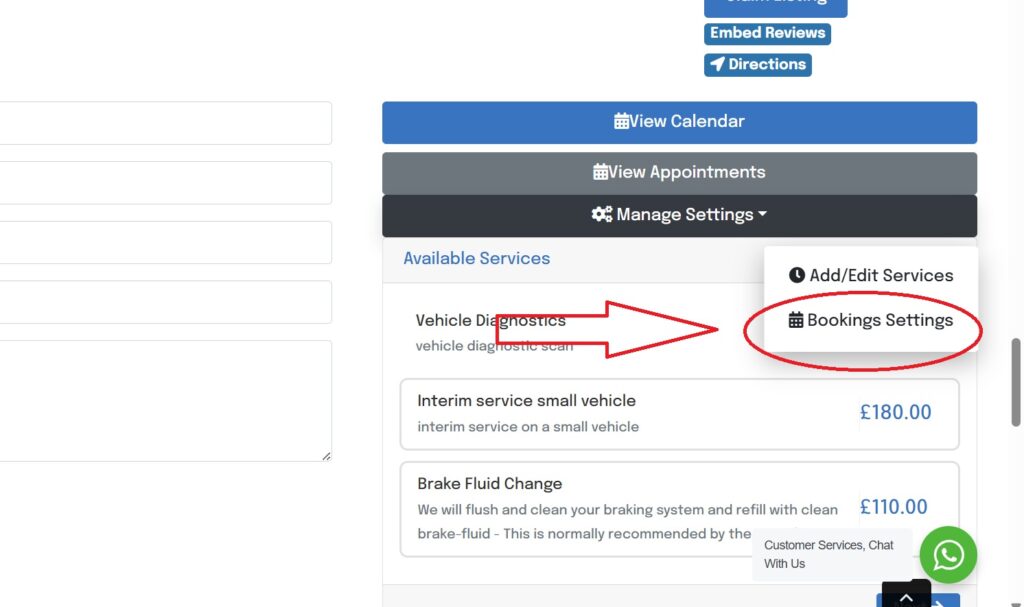
Head down to the bottom right hand side of the page and select the drop down menu “Manage Settings” and select “Add/Edit Services”. Manage settings > Add/edit Services
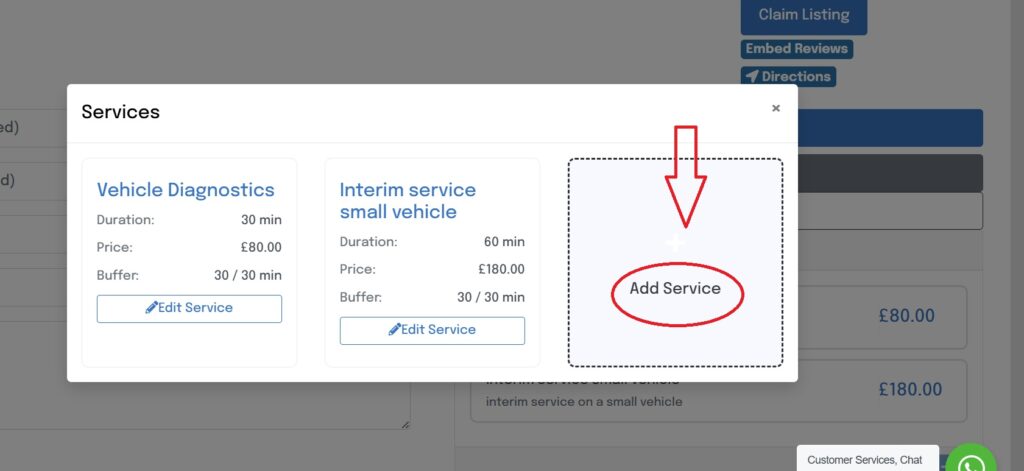
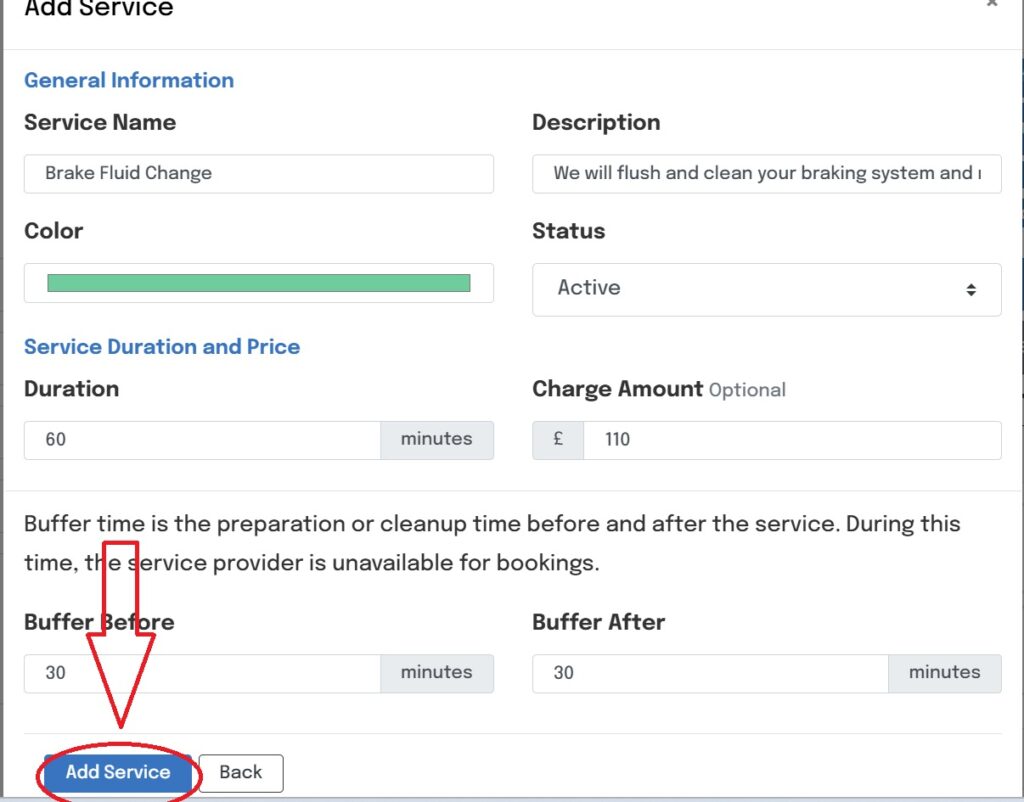
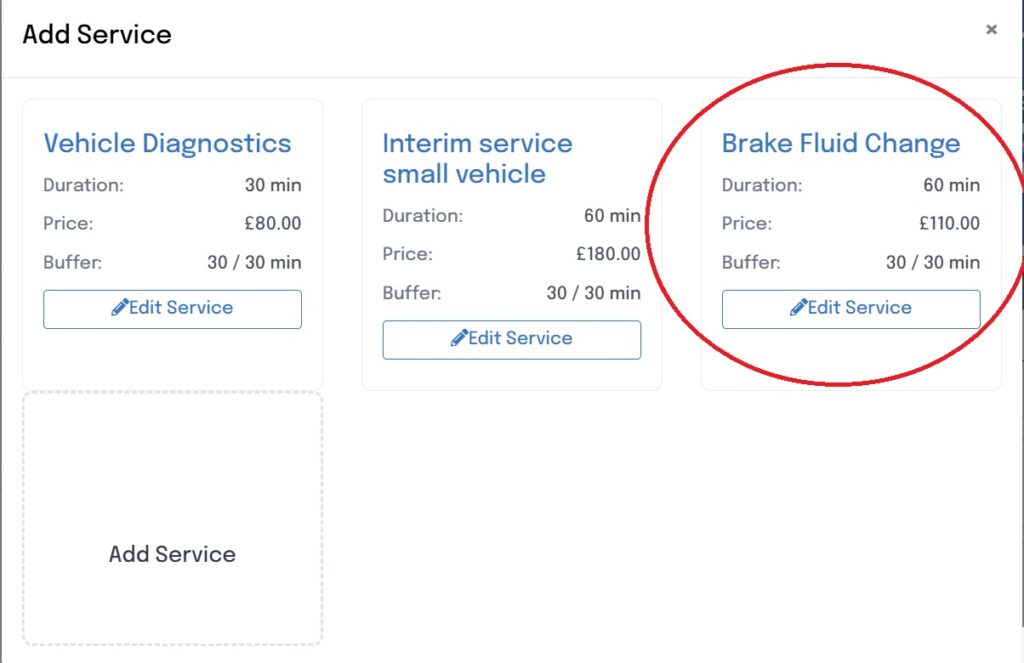
Once selected current services should appear if any already exist but at this moment you are selecting “Add Service”
A light box will appear with options to create your services
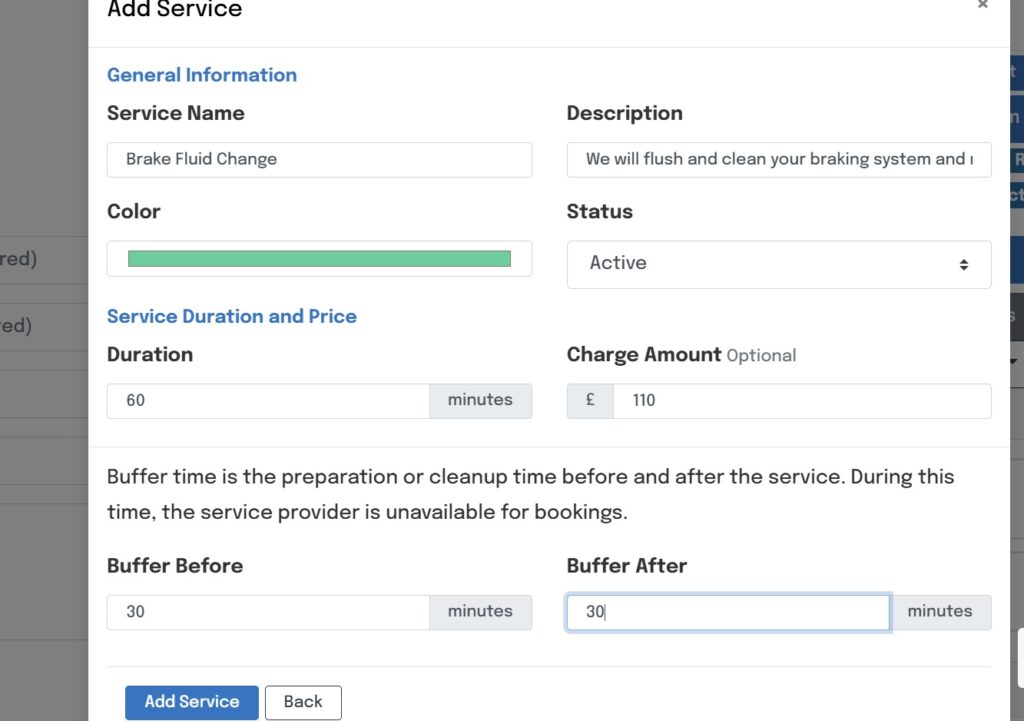
Service Name – Entre the name of your product or services
Description – Entre the description of your services, make this as informative as possible.
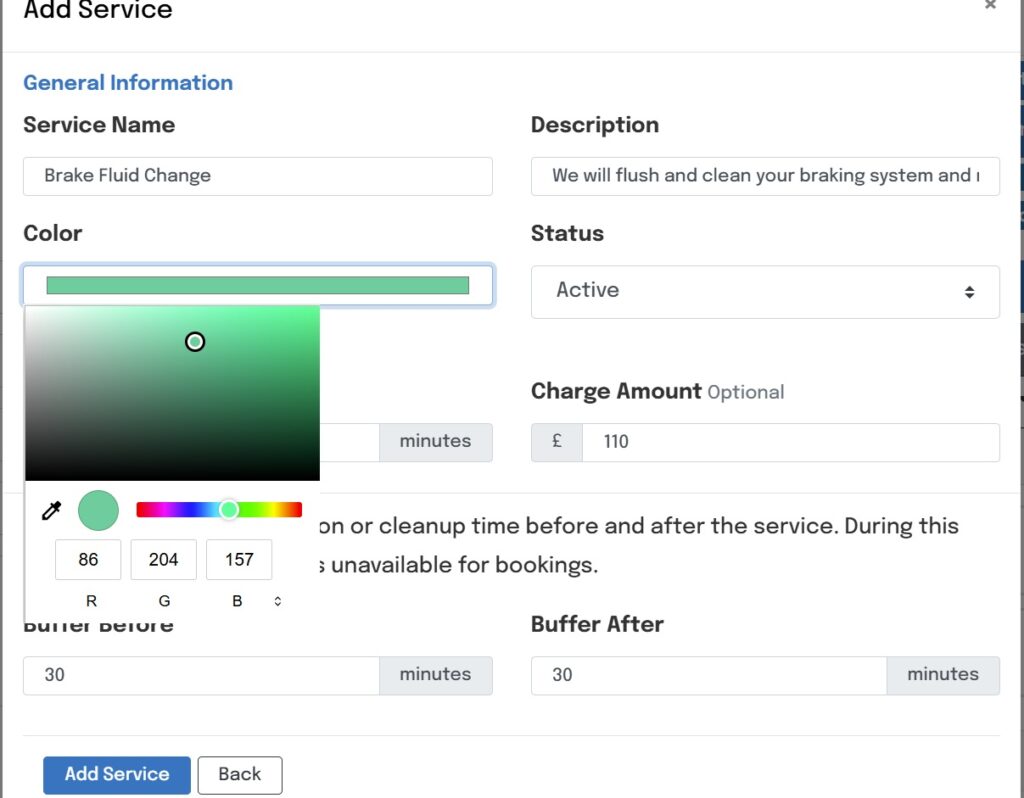
Colour – Many different shades of colour can be selected and added to your services
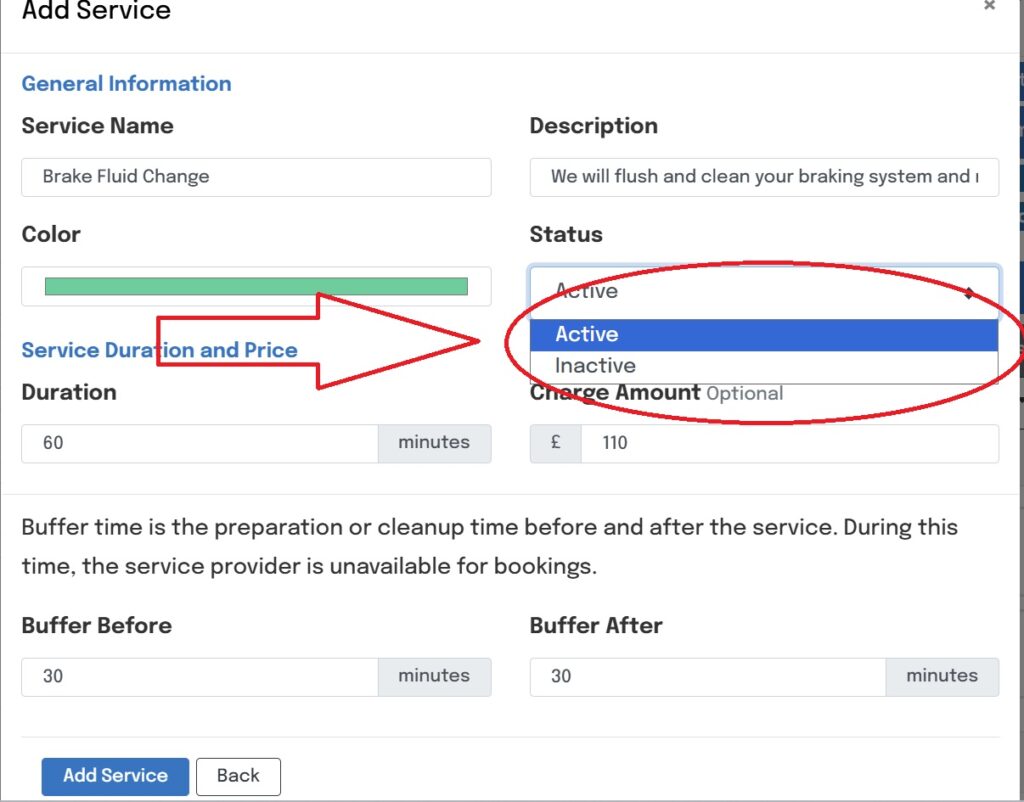
Status – Active/Inactive, mark the service as active to allow bookings or Inactive to make the service un-bookable
Duration – This is the length of the time to take up in the diary.
Charge Amount – This is the price that the customer pays.
Buffer before – Slot kept clear pre booking
Buffer after – Slot kept clear post booking
After your happy with your service click “Add service” to complete
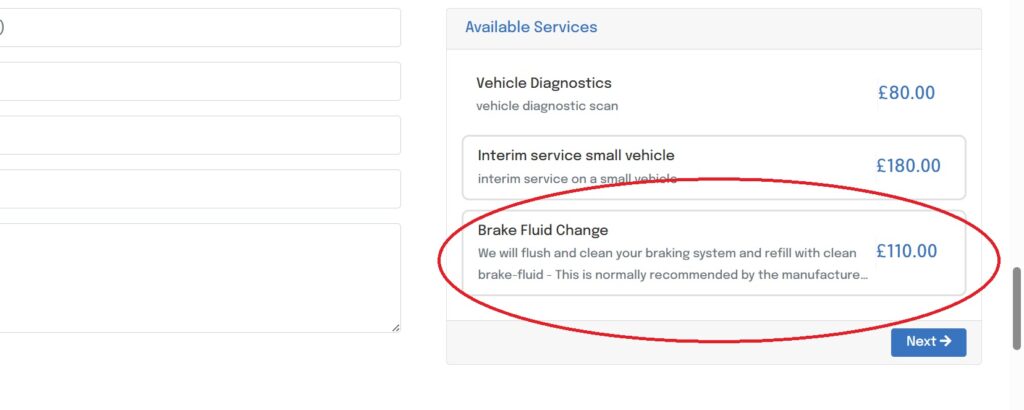
You can re entre the services at anytime to edit or update your service. Now you can see the service listed in your Listing
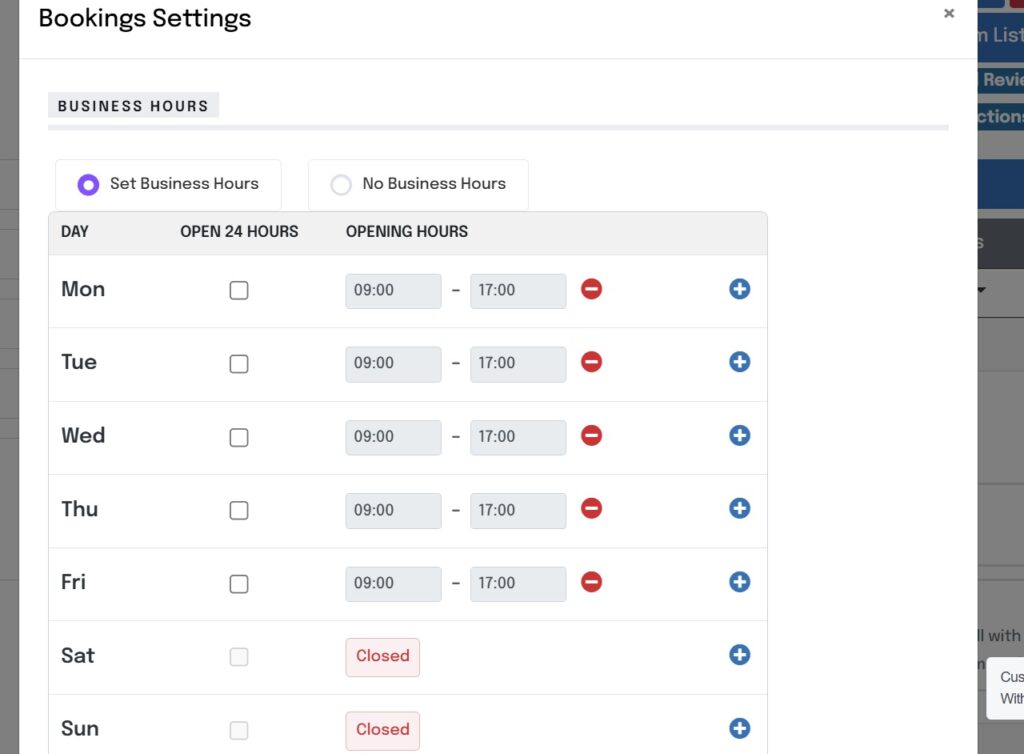
Now head over to “Bookings Settings” in the dropdown menu for “Manage Settings”. Manage settings > Bookings settings
We have fully set up a default settings, services and pricing to get you started, adjust and alter as to fit your business needs.
Set Business Hours – Adjust your workshop hours, these can differ from your listing hours, your in control, list whenever you want to take bookings.
Time Zone – Double check your time zone is set to London – UTC + 1
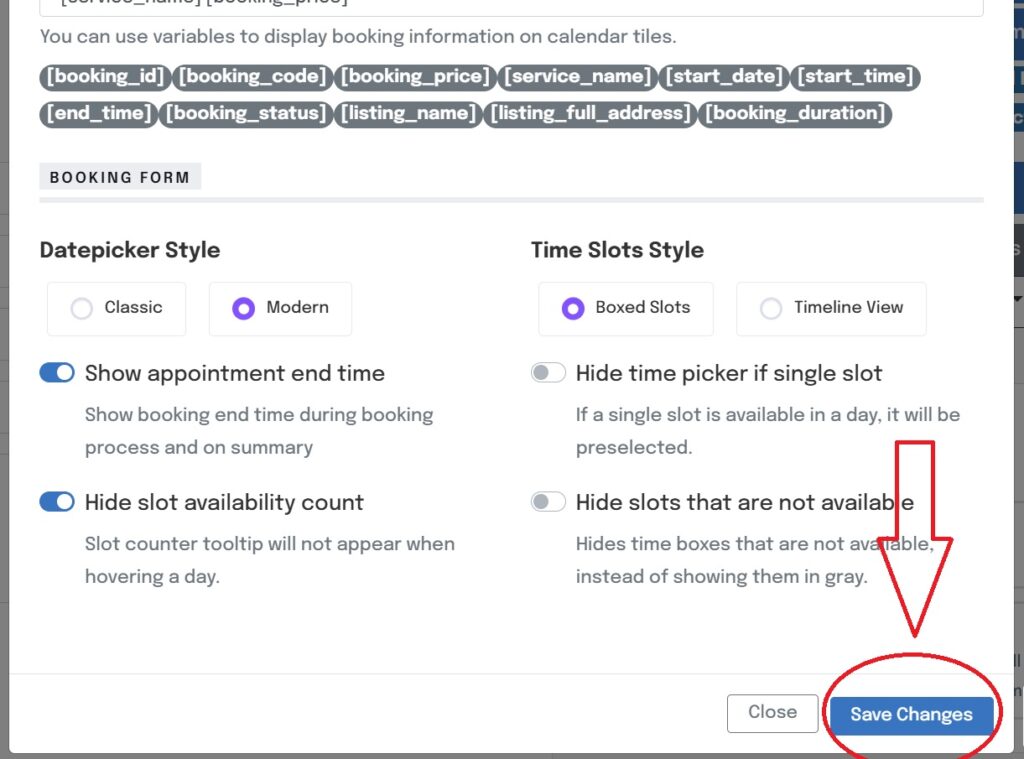
Booking Tile – Copy and past the short code next to [service_name] that you want to appear on your calendar display. we have pre set them as default but the option is there to change if you so wish. we recommend leaving as default
Booking Form – Adjust the 6 options below to suit your preference, you can always come back later and play around with different features.
Select “Save Changes”
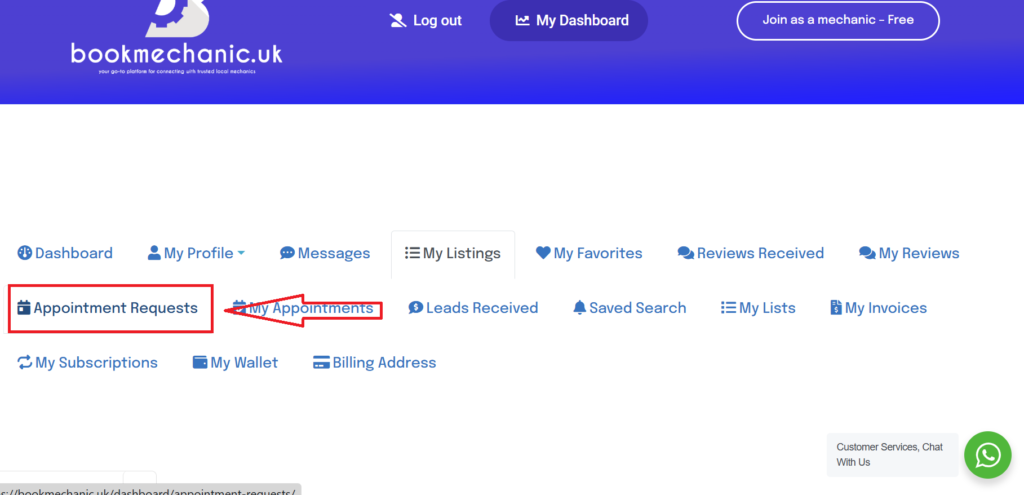
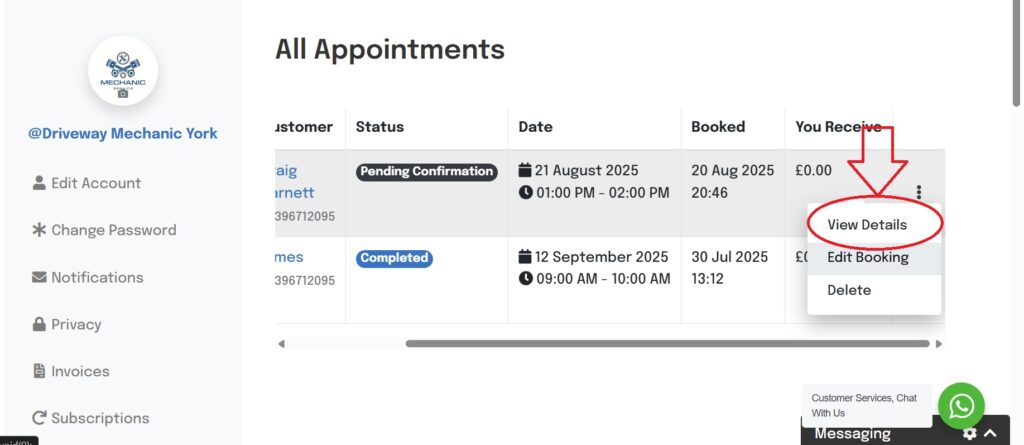
If you head over to your dashboard page and select “Appointment Requestes” this will let you view all bookings made through your listing. Account > All Appointments
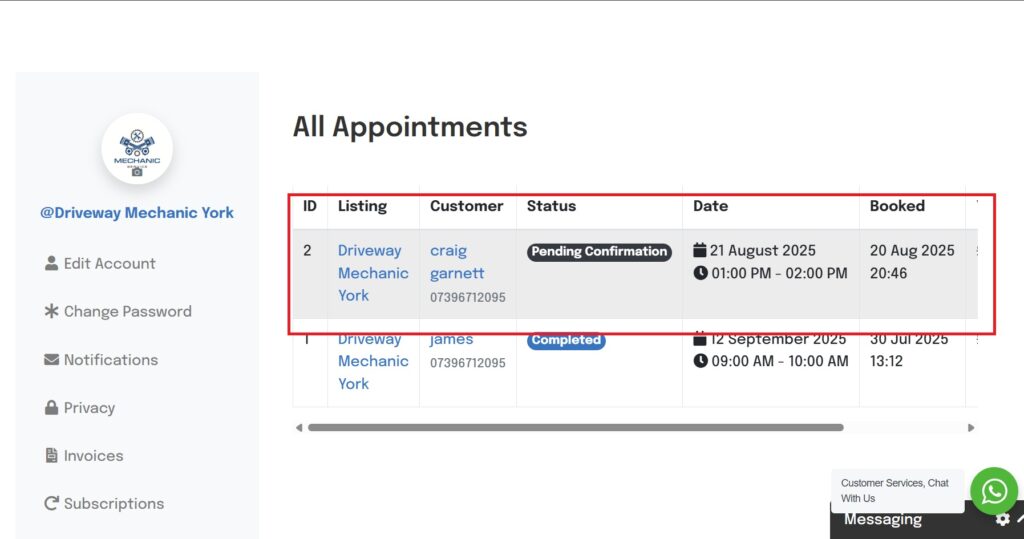
A list of appointments will appear with all bookings in several stages of completion.
Select the three dots to open a drop down menu and click “View Details”. dashboard> Appointments requested > View Details
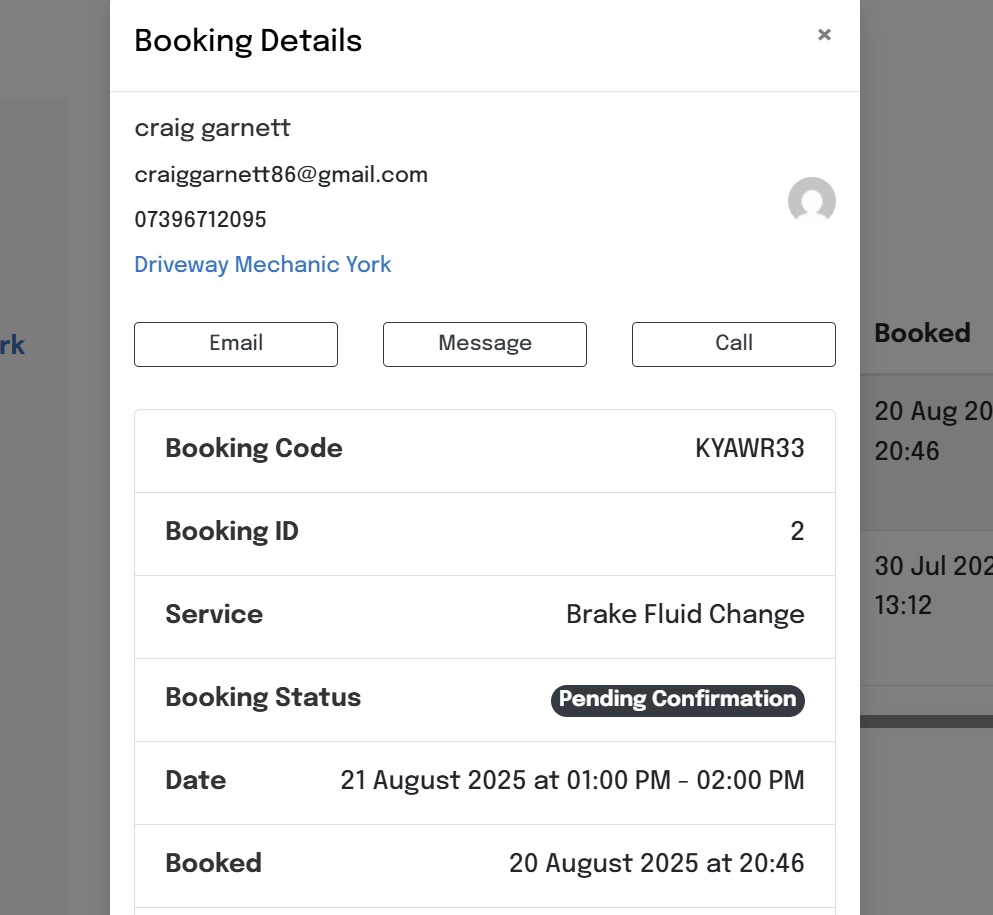
This will open a light box with all the information selected in the booking tile section. These bookings are not set in stone and is up to the mechanic / garage to contact the customer to confirm / adjust any bookings. Edits can be made in the next section.
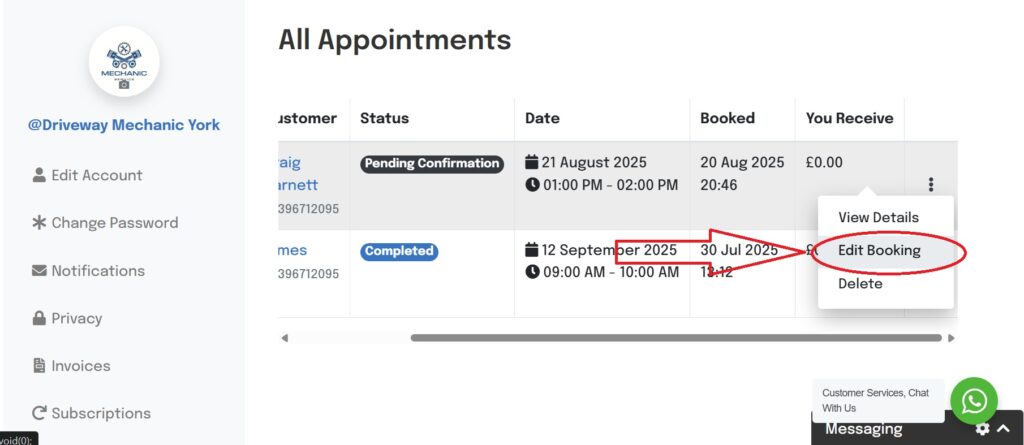
Next select “Edit Booking” in the drop down menu. dashboard > Appointment requests > Edit Booking
This section you can adjust appointment details and mark the booking as one of the available options below.
Appointments are requested by the customer however if you have to change the booking please contact the customer directly.
By bookmechanic.uk|2026-03-07T19:19:11+00:0018 May 2025|Comments Off on Setting Up Appointment Tool